
This weekend, our badass pal from the north, Mary Bruno of Bruno Press is checking in with her tips on reduction linoleum cut printing. Mary is one of the finest with this technique and I’m thrilled she can share her knowledge. If you ever have a chance to take one of her workshops (like an upcoming late nighter with typewriters!) or visit her Minnesota shop, please do.
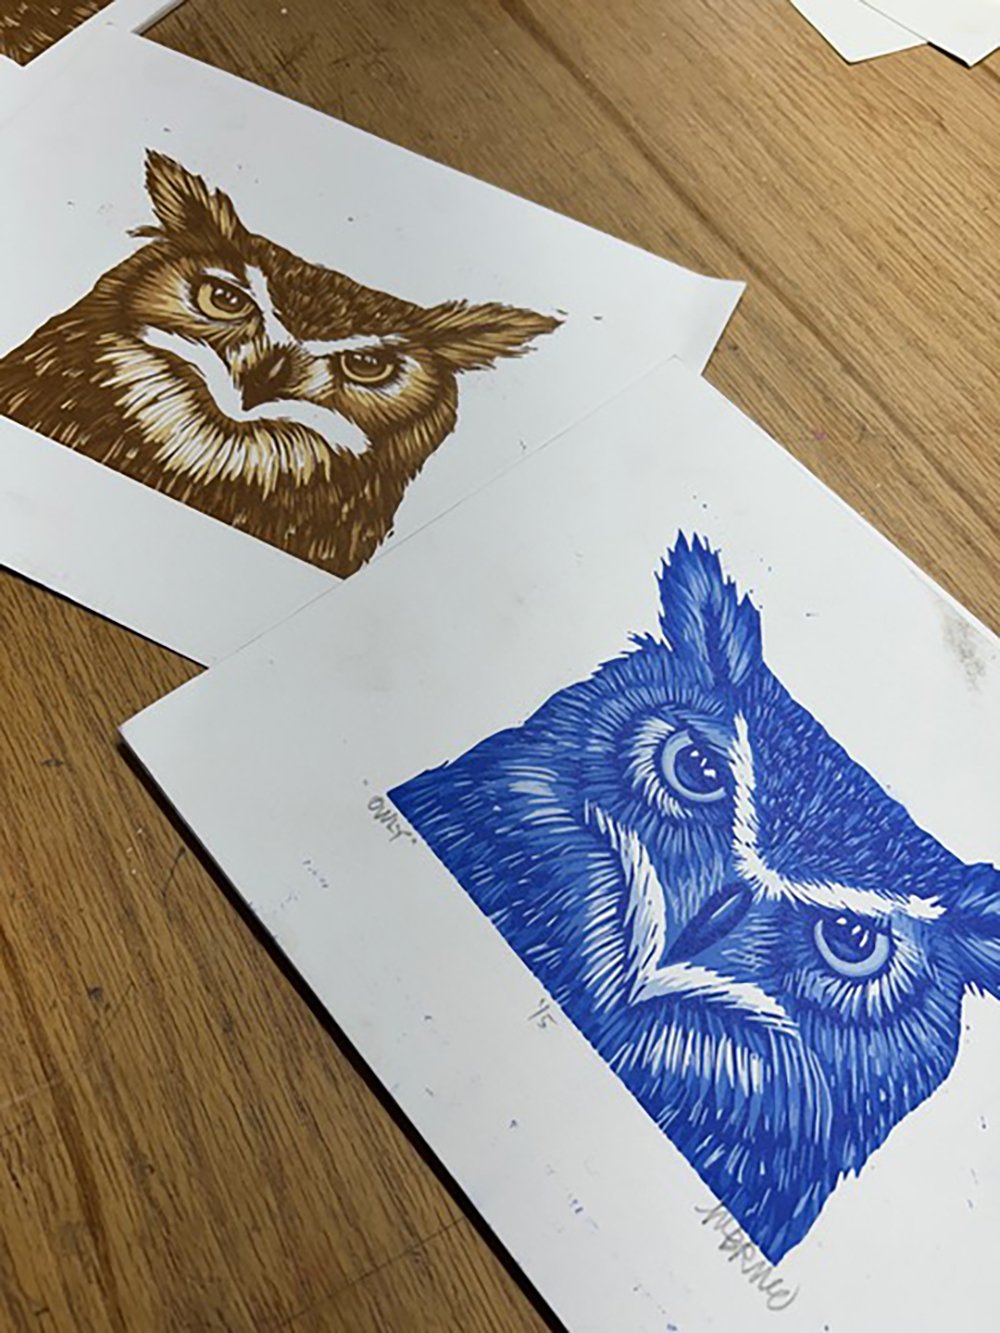
Okay, I do love to figure out a reduction print, but it does not work with just any ol’ image. Much work has to go into planning before any carving can begin. When I teach reduction workshops, which I have done a gillion times, I have learned the best way to teach it to people that don’t understand it. The first thing I learned was that I supply the images choices, because people do not know what they are looking for. I start with images where you can see at least 5 different hues of the same picture. For example, this owl is perfect.

The first thing you do is transfer your images onto the mounted linoleum [ed. note: there are lots of ways to do this; the internet is your friend!], since we are printing the blocks on the Vandercook. Once the image is transferred, people need to look at the image and begin by carving away what is white, or the color of the paper. That seems easy and clear. You’ll use JUST ONE block for all of the colors, hence being called a reduction linocut print.
Then the block gets locked into the press and stays in that EXACT spot, and you NEVER move anything, not a single piece of furniture until the process is over. This is important so that everything lines up perfectly, which is what makes the BEST reduction prints.

I always do my reductions on cotton-y paper so that ink will soak in and I can keep printing on top of fit. I learned that by using a more glossy paper and each time you printed over the not-yet-dry ink it would pull it right back off or smoosh it around and make a mess. I recommend a Cranes Lettra or Flurry.
When teaching this I also try to make the color transitions simple, too. I grab a PMS book and tell folks that we start with the lightest of the color and move down a step darker at a time.

In these workshops, I keep it to 5 “runs” or times through the press. I explain that you want each level to integrate with the next in a blending sort of way; you also don’t want to carve too much or too little on a layer or you waste it. You want to sort of balance each time with the rest.
The owl image is another great example of blending each layer with the next and not to just do solid sections as it will be a much more impressive end result.
As we go back and forth from the carving to the press to print, people start to understand what is happening and how to select what to carve and what to keep. You can always carve away more but you cannot put back what you have carved away. The clearest steps are the first and the final, since you can see what is white and clearly know where to carve in the beginning and at the end you know what is the darkest or the black parts. The key is to also figure it out on all the middle steps.
Always load your paper the same, making sure you put your block in the right way, too (if you take it out between passes to carve the next layer).

I often try to keep a print from each press run, so that later you can see what happened at each step. This is a great resource for people attempting to do this as well, then they can see how much changes with each step.


It is also at this time that folks start to understand that this is a limited edition process as well; when you are finished carving, the block is done and so is the edition.

Here’s the owl block when it’s in its final version!
