
Occasionally, I need to officially number something in the shop. That’s when these handy numbering machines come out. They’re a dime a dozen and you can find them at most places that sell letterpress equipment. I’ve got some with sans serif letters and some with serifs. All the options!
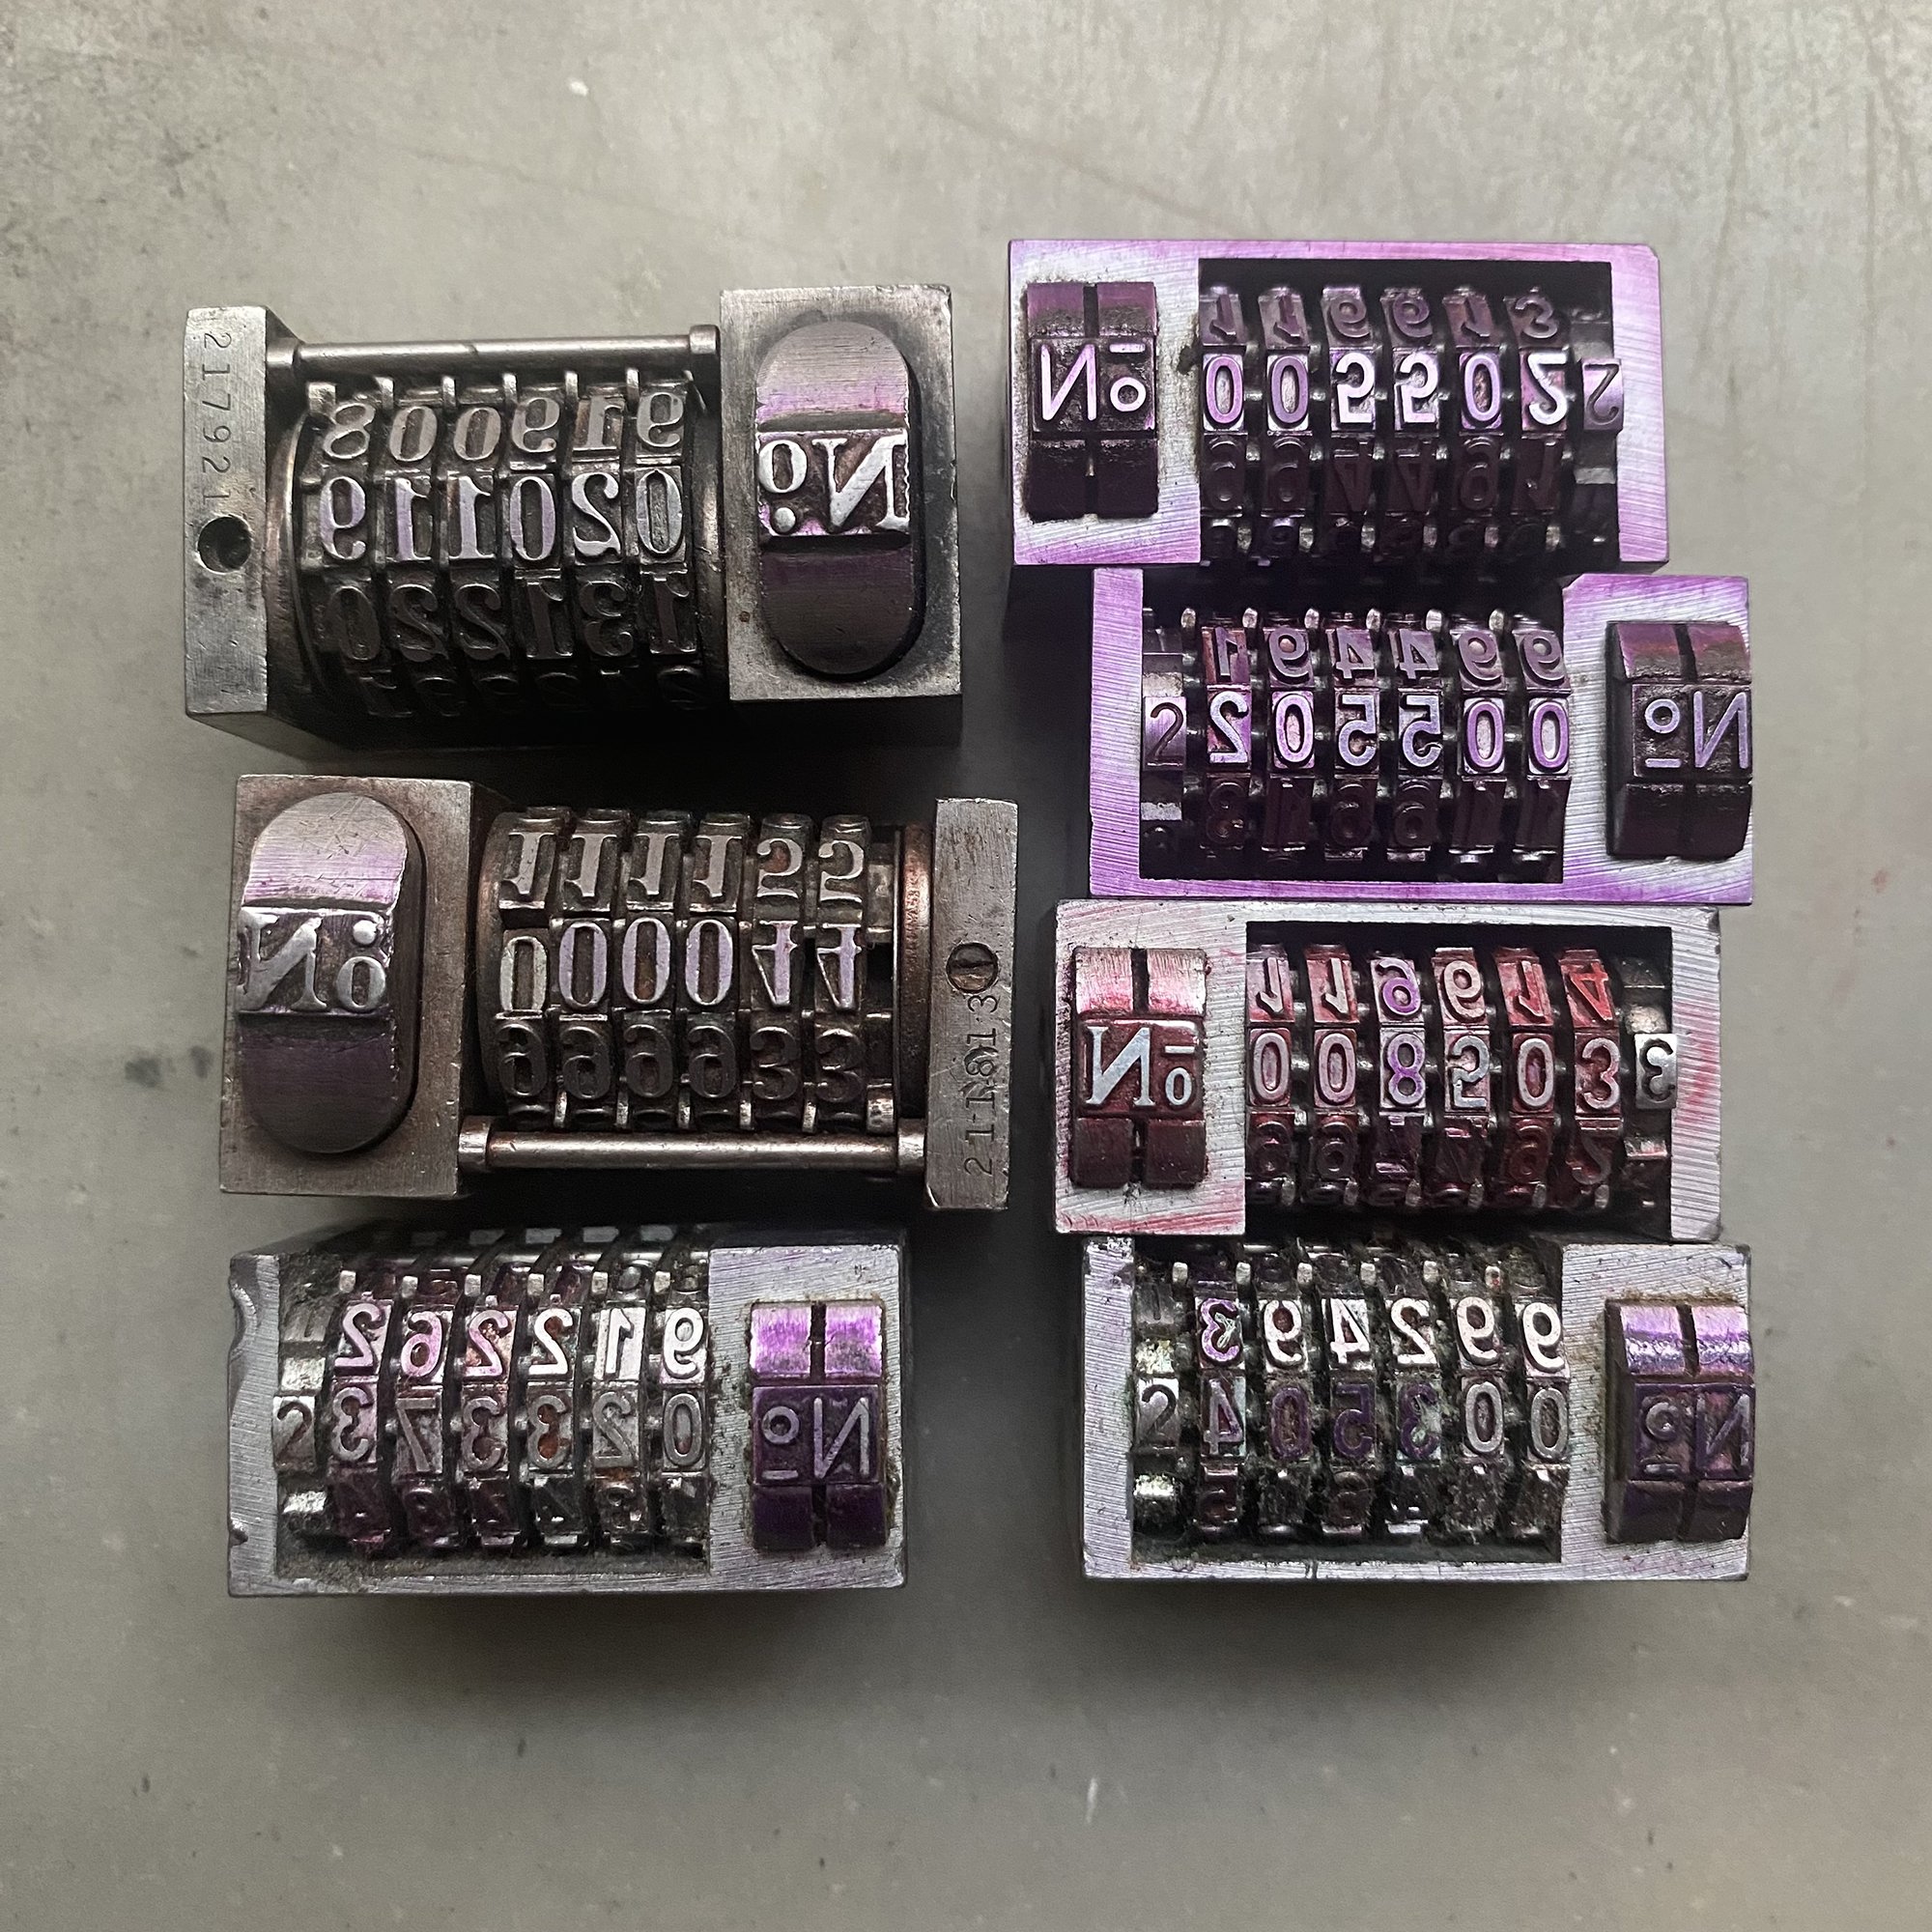
These are pressure activated so that when you make an impression, the ‘No.’ depresses and advances the number reel to count up or down. There are variations in how they work but I’m going to show the ones I use the most because they offer a lot of options.
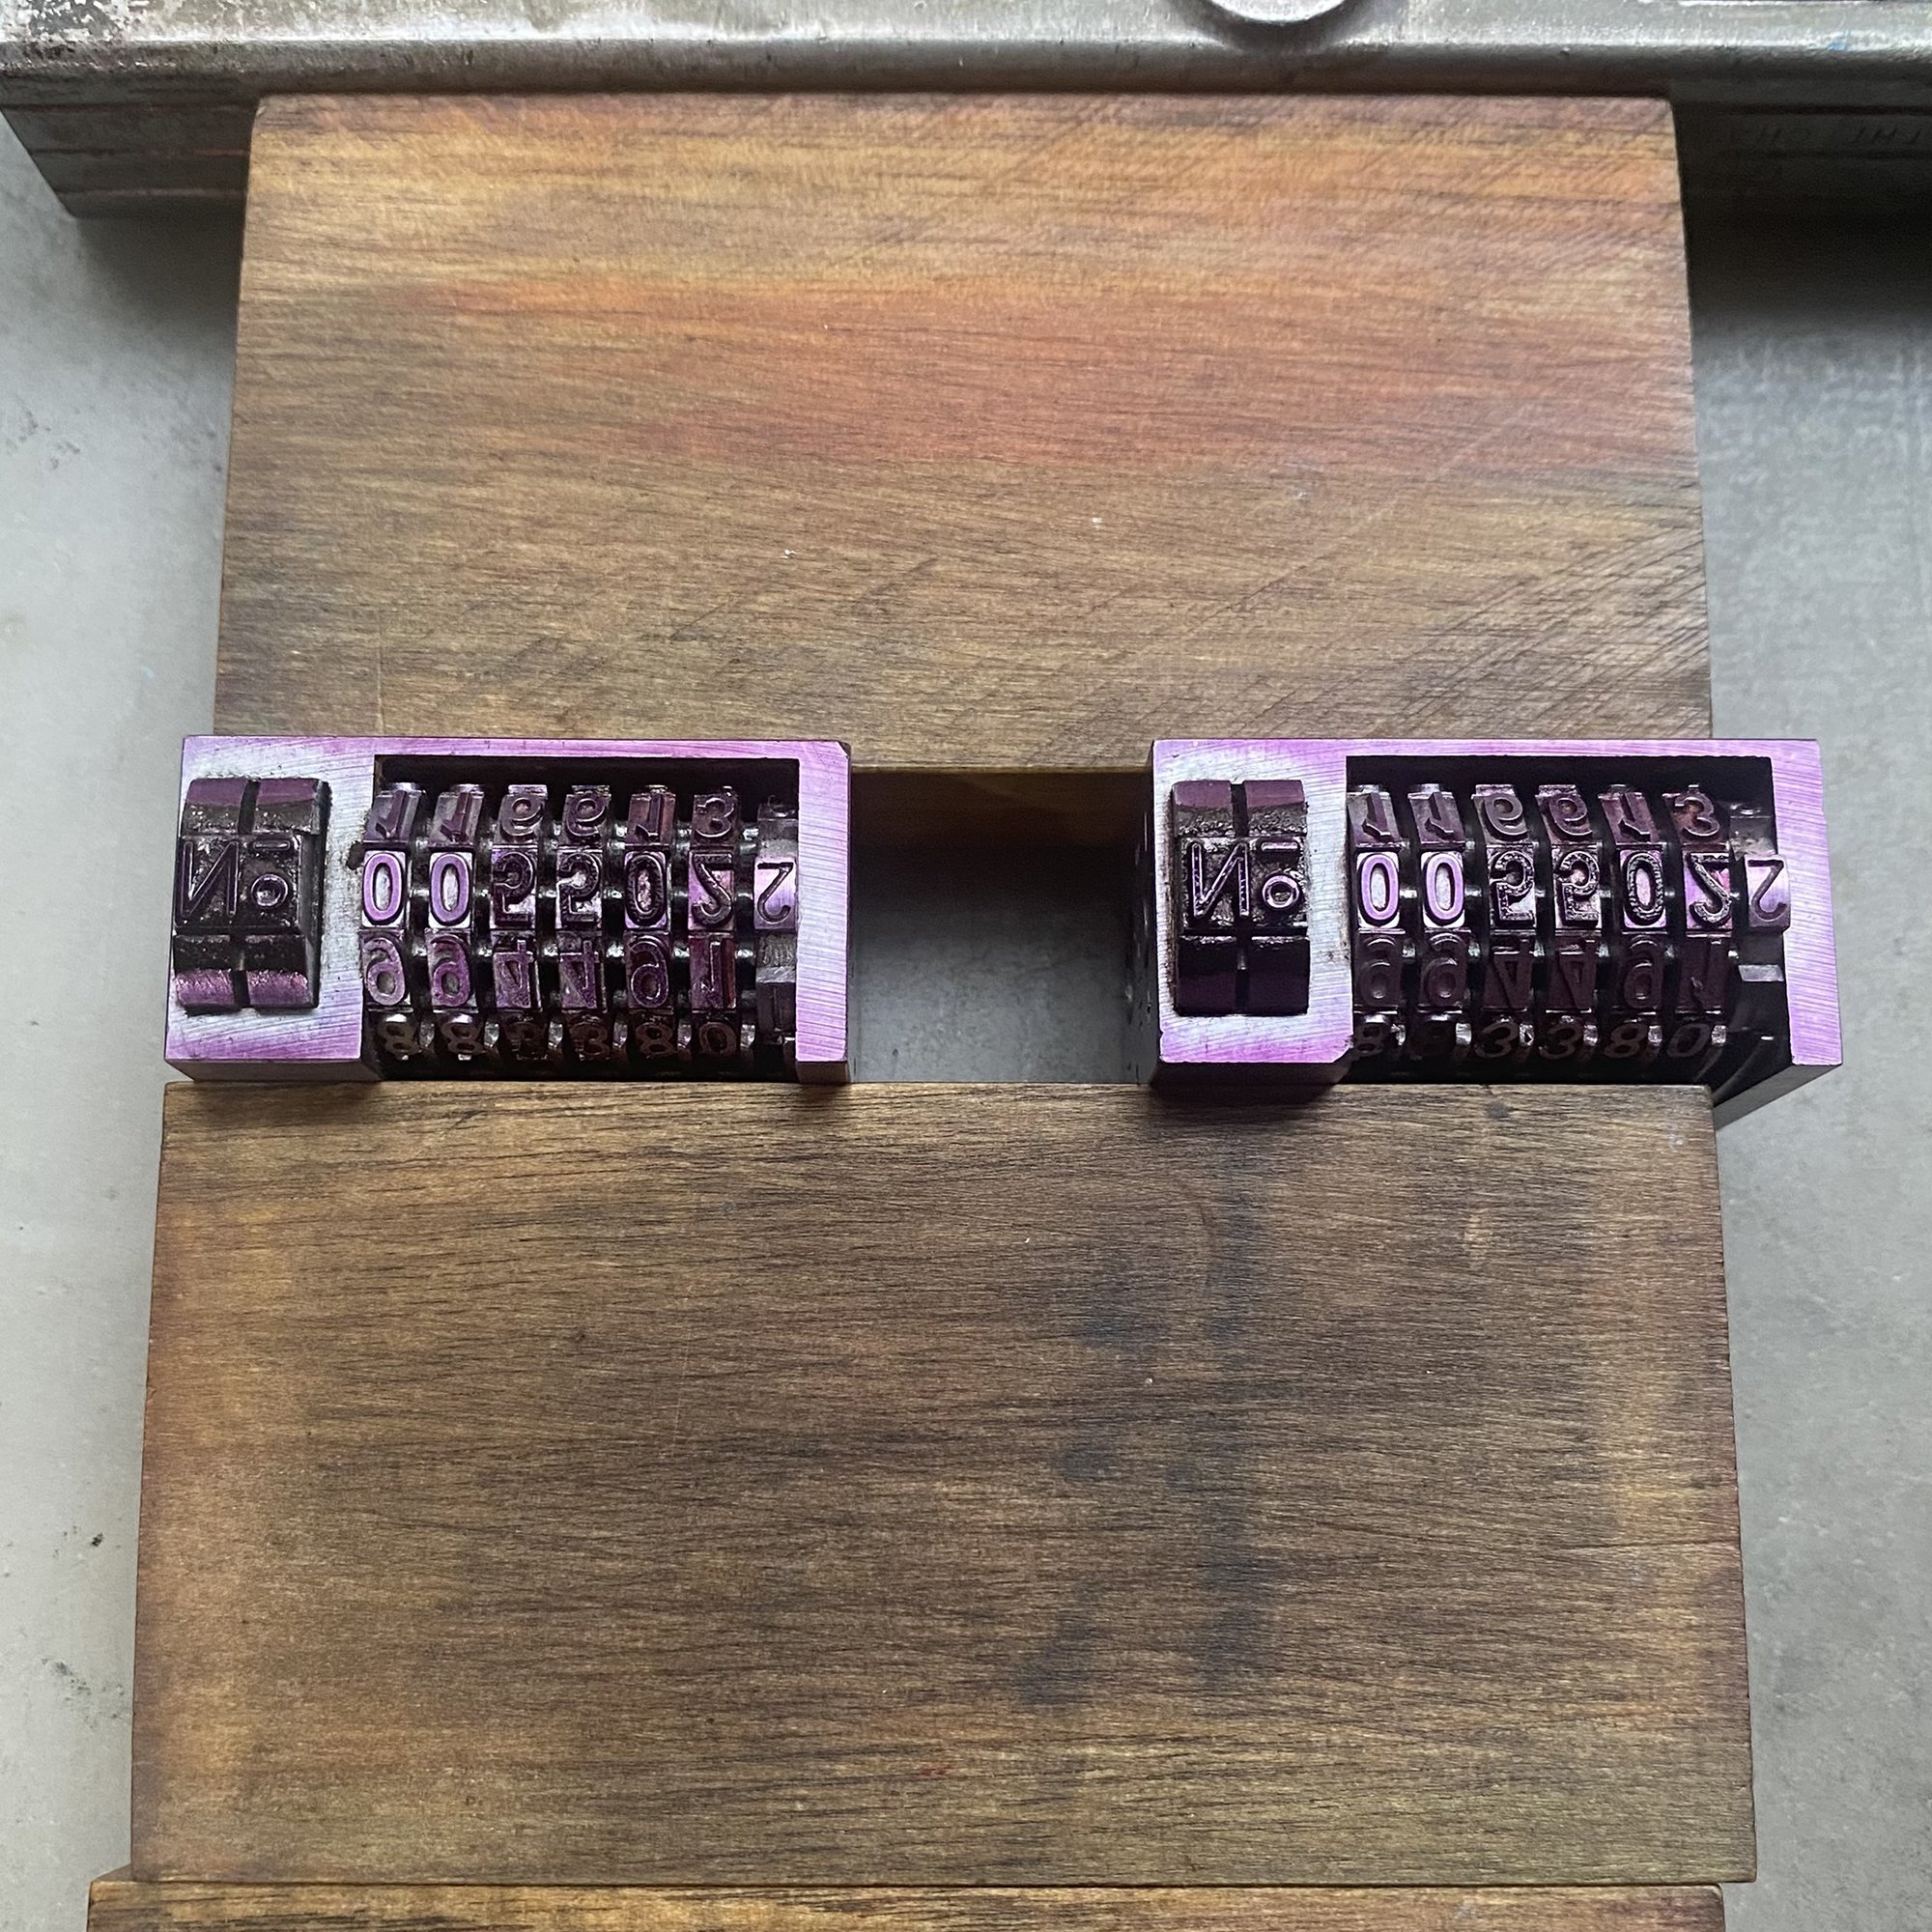
I do one job twice a year that requires these little wonders, so I’m showing that process here, as it involves a more advanced setup than numbering once on a print. When I lock these up for this particular job, I only put one quoin in, which I know is against best practices. I discovered with my numbering machines that if there’s a little too much pressure, they don’t rotate correctly, which is why I do the bare minimum.
The sans serif machines are my favorite. You can see a small, different number to the side that’s right reading. This tells you how many places WON’T print, IF you set those first two places to zero, which you can do manually. In this case, I only want 4 numbers to print.

If you look from the side, you can see that the two zeros are lower than the printing numbers and won’t print.

Also, on the side, you can see a small depression that can be switched from side to side. This is for either counting up or down and I convert it with my etching needle.

I set these up and get the placement correct on the final print BEFORE I go about adjusting for the correct starting number. There’s too much tweaking with the makeready at this point to also be concerned with what numbers are printing. The numbers themselves can usually be manually shifted to the correct spot when you’re ready to get serious.
For this job, the numbers have to appear twice, once on the receipt section of the gift certificate that the store keeps, and once on the certificate itself. The ‘No.’ part has to hit with the same impression in order to advance the reel, but we don’t want it on the final print. So I add a little piece of paper the same thickness of the certificate to the non-printing part to achieve this.


But I also need one to hit ON the certificate without printing. So I set up this frisket, using grippers on the press (this is all done on my C&P platen) and then piece masking tape between them. Now the ‘No.’ will print on the tape and not the certificate, while still advancing the reel.

With every run, I keep a note of where I left off the last time so I know where to start again. These certificates are ultimately turned into pads along the receipt side so they’re easy to move around the shop and keep track of. I also got a great tip from Paul Aken at the Platen Press Museum about stacking numbered prints. After you pull each print, flip it upside down on the receiving board so that the numbers will count correctly as you go up, without having to manually flip them after the fact. Or, you could set the counter, if it has this option, to count down instead of up.

If you’ve got numbering machines lying around, give them a whirl! They can also be a lot of fun as an artistic element in your print work, which gives you the opportunity to get a handle on their peculiarities.
Also, huge shout out to Gethsemane Garden Center for commissioning these for the past 20 years. They are pretty much the only job I do from plates vs. type given that we print over 2000 every year. They could easily convert to plastic gift cards given the volume but instead choose to support another small business. Together we create something beautiful that people WANT to buy, and I’m grateful.